
R&R Blower Control Transistor - 635CSi:
There are a number of
excellent guides to this process in the b_c_g technical reference already. As I have now had the privilege of
doing this twice, I thought that some pix might help out. We wonít go into a great deal of detail
(and then again, maybe we will) and you should read the other excellent
write-ups as well. You need to
know that there is no warranty on this procedure, and, of course, you do this
at your own risk. Then again, if
you are a cheap ba?tard like me ,you will forge ahead.
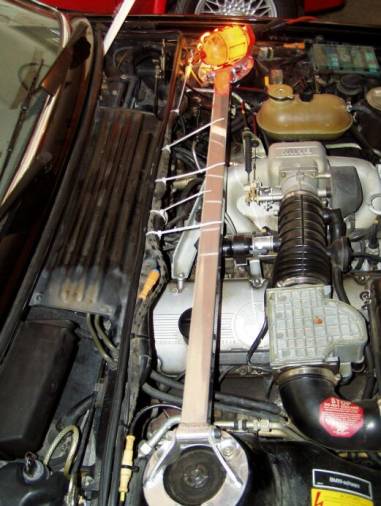
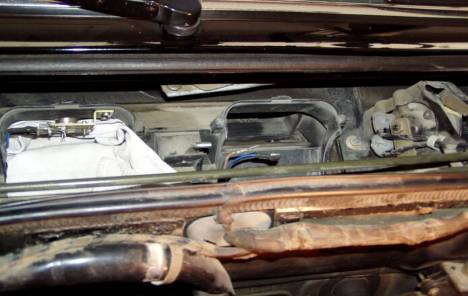
The black
aluminum cover is where you want to be.
Two screws
along the
top back edge; four along the lower edge on the firewall.
Cut the
wire-wraps off and move the wiring loom down to access
the lower
screws.
See the beautiful
strut-brace? See it shine; see
that its right in the
damn
way!! Be sure to drop at least one
screw into the engine compartment.
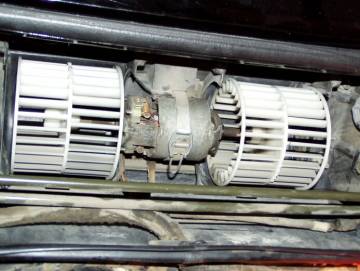
Work the cover out and this
is what you will see:
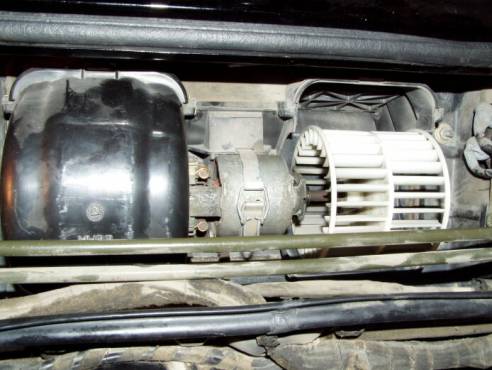
Yep, the
blower motor and the squirrel cages.
Note that the right cover has already been removed.
Donít get too excited
yet. We have some other things to
do first. See the two green lines
at the bottom of the compartment?
They are clipped into a holder on each side of the blower
compartment. Carefully lift them
out and push them down and out of the way.
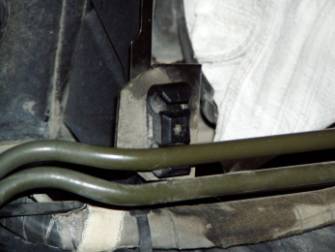
A/C Line
Clips ñ one on each side
Next locate the two little
brass clips on the upper sides of each black squirrel cage cover.
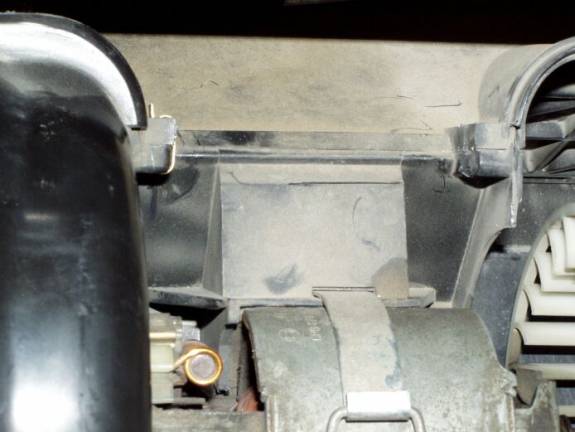
Thatís it on the upper right
of the left blower cover. One on
each side at the top. Pry them off
and donít lose them. Next, gently
pry the latching tab on top of the blower cover downward and release the top of
the cover. Pull gently up and work
the bottom of the cover free as well.
You now have to worm this cover out of the compartment ñ carefully. Donít break anything. Note that the cover has a slotted latch
on the top and a tab on the bottom.
Remember this - thatís how it goes back - tab at the bottom and slot at
the top. Remove the round end
guard and note that it has a flat spot on itís edge. This goes back along the flat surface of the compartment
bottom.
Now you see this:

Note the latch in the center
of the blower complex. Undo the
latch and lift the blower assembly up until you can unplug the motor
leads. Theyíre sexed so you canít
put them back on wrong so donít worry.
Carefully lift the assembly out and put it somewhere safe. Nowís a good time to lube the bushings
with a drop of motor oil. Donít drop this assembly, its fragile and expensive.
Ugly isnít it? The brown and blue leads are the blower
leads. In the left intake, at the
top, the object of your desire:
the blower control (just above the white towel). That ugly blob to the extreme right is
the OBC CODE horn. Thatís what
bothers the neighbors when you canít remember the code that you set.
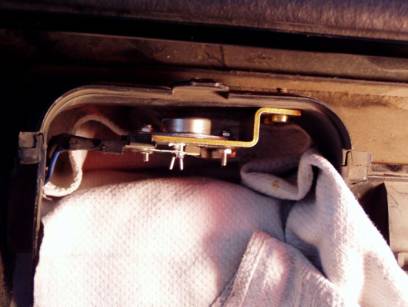
Note the
tab at the top of the cover.
Remember: Slot on the top. Tab on the bottom. Youíll hate yourself if you get it
backwards.
Hereís a better view. Next problem: remove the two bolt/nut complexes that hold it in place
(right side). Answer: stubby flat screwdriver and a tiny
wrench or pair of pliers.
The nuts are on top of the
intake housing and are about 5/6/7 MM I guess. I used my finger as they had been out once before and
werenít too tight. BTW, stuff a piece of cloth or a towel into the intake to
block tiny things from the depths of hell that are at the bottom end of this
intake run. Its inside the
dash. Trust me, you donít want to
go there.
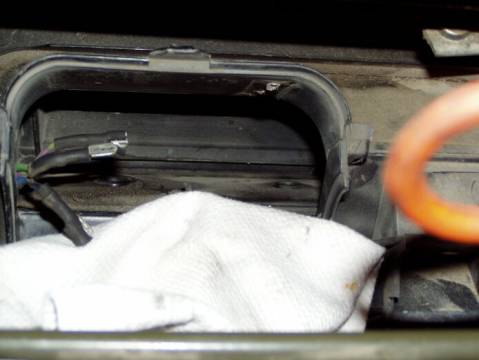
See the board leads? Once you have the board free, unplug
them. They are also sexed and
sized so that you canít screw them up.
Just to be safe, write the wire color down in order from front to back
in case your board is different.
Now its time to go to the kitchen and get into your spouseís way.
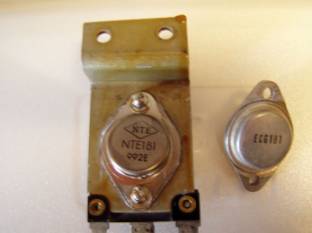
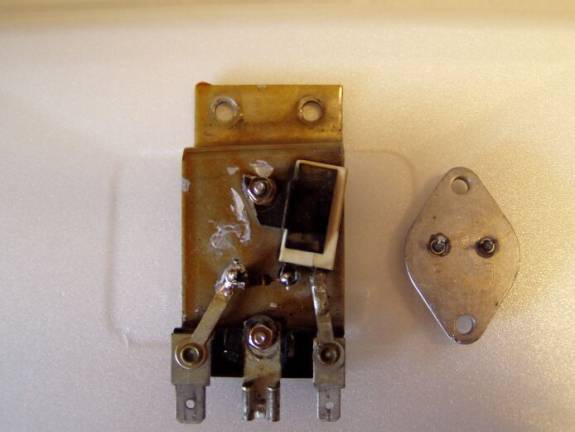
Hereís the bugger that makes
your life miserable.
The transistor you need to
replace is a 2N3055. Get a 2N3771
from an electronics supplier. Get
a small tube of heat sink grease from Radio Shack as well.
Look carefully at the back
of the board and new transistor.
Note that the transistor leads are closer to one end than the
other. This keeps you from putting
it in backwards. Now the bad
news: the original transistor is
riveted to the board. You will
need to grind the rivets off carefully and desolder the original transistor
from the board. Note that my board
had a small resistor bridging the two transistor leads. If yours has this make sure you solder
it as well. Replace the two rivets
with small bolts and nuts. Put a
glob of heat sink grease on the back of the new transistor and bolt it
down. Solder the leads and
resistor together. Be careful,
soldering irons get very hot and can harm you!!
I could
injure myself with a roll of Scotch Tape!!
Go it done? Back out into the heat with you. Reconnect the board to the leads and
bolt the board in place. There
isnít any easy way to hold onto the tiny nuts, but you can get you big hand in
there if you try. Hint, do the
rear bolt first.

Thatís what
it should look like. You can trim
the leads if you want.
Put the blower motor
assembly back, connect the leads, and latch it down. Now stop and make sure the squirrel cages turn freely and
that the blower leads are not rubbing the cages. Clear the tools away and try the fan from inside the
car. All should turn freely and
there should be infinite speed selection from the blower control.
Now take the end guard and
orient it into place. Remember the
flat spot goes towards the bottom/back flat part of the compartment. You will have to fiddle with it to get
the whole assembly back together.
Worm the top blower cover back into the space and seat it at the bottom
first (tab at the bottom, slot at the top) and then the top. Stop. Make sure that the blower cages turn without dragging on
anything. O.K.? Now snap the two brass clips back into
place. Repeat this process on the
other side. Test at each step to
make sure the blower isnít binding on the covers. Its hard putting the covers back on as they now hate you for
disturbing them in the first place, space is tight, and the end guards keep
falling out of position. Keep
fooling with it; you will get them back on eventually.
Once you have both covers on
and clips in place, test the blower again for the inside. Everythingís O.K.? Good. Snap the A/C lines (green) back into the clips
carefully. Put the black aluminum
cover back on and zip tie the wiring loom back into place.
Think about what you have
done and mentally make sure that you put it all back together the way you were
supposed to.
Oh yeah, back the car out of
the garage:
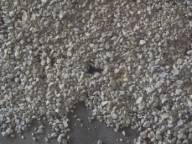
Clean kitty
litter. Sign of a happy M30.
Hereís that screw you
dropped.
Thanks to Jim Booth for the
info on the cross-referenced, newer, better, hopefully lasts-longer transistor.
Bob Duckworth